Development guidelines
Coding guidelines
The following are some guidelines on how new code should be written. Of course, there are special cases and there will be exceptions to these rules. However, following these rules when submitting new code makes the review easier so new code can be integrated in less time.
Uniformly formatted code makes it easier to share code ownership. The pygada project tries to closely follow the official Python guidelines detailed in PEP8 which detail how code should be formatted and indented. Please read it and follow it.
In addition, we add the following guidelines:
Use underscores to separate words in non class names:
n_samplesrather thannsamples.Avoid multiple statements on one line. Prefer a line return after a control flow statement (
if/for).Please don’t use
import *in any case. It is considered harmful by the official Python recommendations. It makes the code harder to read as the origin of symbols is no longer explicitly referenced, but most important, it prevents using a static analysis tool like pyflakes to automatically find bugs.Use the numpy docstring standard in all your docstrings.
The attributes for specific classes are Pandas data.frames, please use lowercase names (eventually with _) as column names.
Contributing workflow
The preferred workflow for contributing is to fork the main repository on GitHub, clone locally, and develop on a branch. For more information on this workflow, see the github workflow.
The workflow is provided for command line usage and using the Github for Desktop application. Feel free to use the environment you like the most.
Fork the project repository by clicking on the ‘Fork’ button near the top right of the page. This creates a copy of the code under your personal GitHub user account.

You’ve successfully forked the pygada repository, but so far, it only exists on GitHub. To be able to work on the project, you will need to clone it to your computer.
Clone your fork of the pygada repo from your GitHub account to your local disk:
$ git clone https://github.com/DOV-Vlaanderen/pygada.git
$ cd pygada
If you’re using the GitHub for Desktop application, navigate over to the bottom on the right hand side bar and click
Open with GitHub Desktop. Once you’ve clicked this, it’ll ask you if you want to launch the desktop application to clone the repository, and where you want to save it. Pick a location on your computer that you feel comfortable with creating files and folders.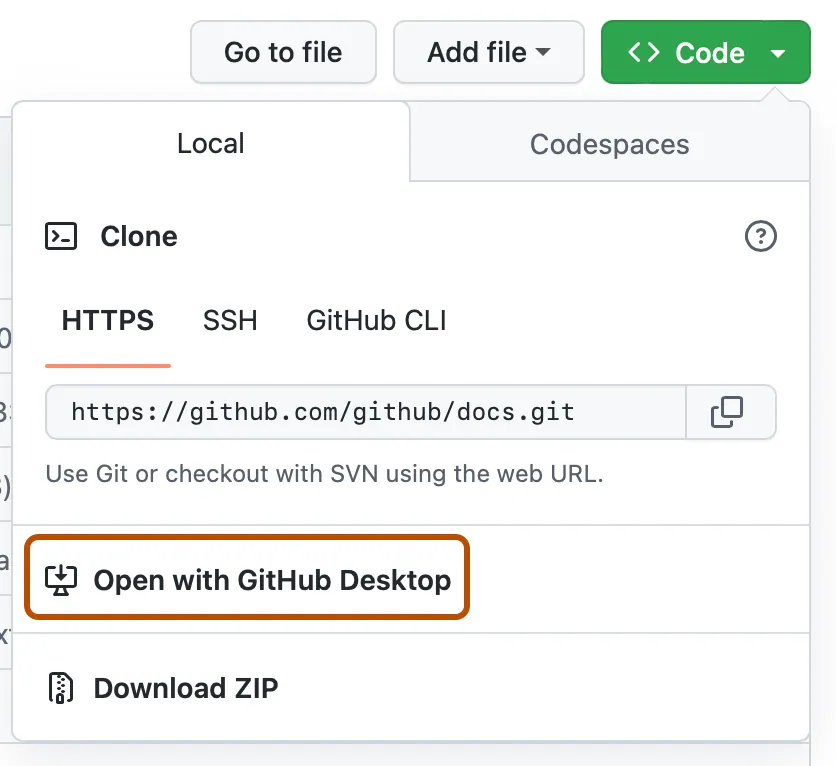
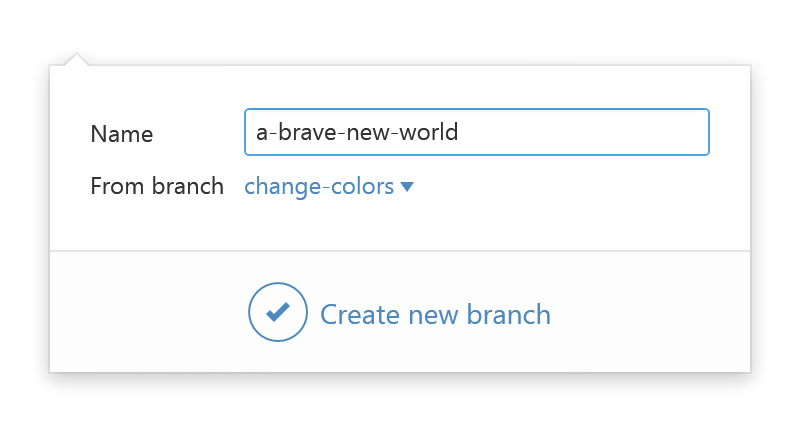
Create a
my-featurebranch (give it the name of the feature you want to develop) to hold your development changes:$ git checkout -b my-feature
When using Github for Desktop, in the top left corner of the repository view, create a new branch.
Always use a
my-featurebranch. It’s good practice to never work on the ``master`` branch!Make sure your development environment is setup to have all the required tooling available (code, unit tests, documentation,…). Follow the development installation instructions for package contributors to setup the tooling.
Develop the feature on your feature branch. Add changed files using
git addand thengit commitfiles:$ git add modified_files $ git commit
which is similar in Github for Desktop, just craft your commit message in the UI.

Make sure you split your contribution in small commits with well-describing names. Write unit tests for new features and make sure these tests are successful. Have a look at the section on unit tests on how to run the unit tests. Don’t forget to update the documentation pages, see the section on sphinx documentation.
Right now, you’ve essentially told Git, “Okay, I’ve taken a snapshot of my changes!” You can continue to make more changes, and take more commit snapshots. When you’re ready to push your changes up to GitHub.com, push the changes to your GitHub account with:
$ git push -u origin my-feature
or, using the Github for Desktop, click on the Sync button, which is right above your list of changes.
Go to the GitHub web page of your fork of the pygada repo.
Click the ‘Pull request’ button to send your changes to the project’s maintainers for review. This will send an email to the committers.

If any of the above seems like magic to you, please look up the Git documentation on the web, or ask a friend or another contributor for help.
Setting up your environment
To start developing, make sure to setup a development environment, provided in the development installation instructions for package contributors.
Note
The repository contains multiple requirements_*.txt files:
requirements.txtrequired packages to use pygadarequirements_dev.txtrequired packages to run the pygada test suite and contribute to pygada code
When adding dependencies, make sure to make the appropriate adjustments in the individual file!
Note
The repository contains also an environment*.yml file, to create the conda environment.
When adding dependencies, make sure to also adjust this file!
Running the unit tests
To run the unit tests, pytest is used. In the common line, you can run all the tests from the terminal,
using the command line. Navigate to the pygada main directory and do:
pytest
When adding new functionality or adjusting code, make sure to check/update/add the unit tests. Test files
are grouped by the functionality. Each file name starts with test_* (required for pytest), followed
by the module name.
Creating the documentation
We are glad to accept any sort of documentation: function docstrings, reStructuredText
documents, tutorials, etc. Documentation lives in the docs/ directory.
You can edit the documentation using any text editor and then generate the HTML
output by typing make html from the doc/ directory. For building the
documentation, you will need Sphinx and pandoc. The _build
directory is not included in the repository as we rely on CI tooling for the
documentation building. The documentation is checked on Travis and build
by Read the docs.